Sunday, July 1, 2012

Mini makeover

Since we are still waiting for our kitchen cabinet that got damaged during shipping to get replaced and are kind of at a stand still with that (not really, there's still plenty for Cody to do, I just have to force him!) I had to start my own project. Once I get a project in my mind, I can't wait to do them. It all started with our hideous hallway bath's gold shower door that looks like it hadn't been cleaned since it was put in in the 70-80s. Seriously, it was gross taking it out.

 I removed it fairly easily and was left with this:

 This is the point where I was thinking to myself "What the heck have I done?!" and wished I could have just put the door back up and pretend like I never touched it. But, surprisingly it came up with just some soap and water and CLR. I also used a razor blade to remove some of the old caulk. Once the shower door was off, I could actually see inside the tub pretty well and realized how disgustingly dirty it was. Oops. Sorry to whoever had to take showers in there :) I will clean it next time, I promise!!!! I literally took a razor blade the sides of the shower and soap scum flaked off. Makes me cringe.

Here's a before picture of the tiny bath. It really is a small space, and if I felt like spending more money, I would probably swap out the sink base for a pedestal sink...but those can be pretty pricey for a cheap girl like me. The wall tile has a weird wavy texture on it and it was a darker tan color that faded to a light skin color. I hated it. Again, the original plan for this bath was to basically gut it and put wains coating and new tile in the shower and an actual tile floor (that's vinyl in it now). I wanted to remove the mirror and put a small one over the sink. I would have still done that, but the light is centered over the giant mirror right now and didn't think it would look right with a light that wasn't centered over the mirror. And I'm lazy and this was a quick cheap makeover that we can eventually build upon.


I ended up just cleaning the tile, putting a coat of primer and then painting the tile and walls...and this is what I got:


 Haven't touched the window yet...I want to add some trim to the window and get new wood blinds for it.
I also got a new satin nickel towel holder and toilet paper holder from Target that I love! I would have preferred a towel bar, but it wasn't going to fit, so towel ring it was!

 Ok, that's it for now. I still want to do a couple more small upgrades to it and clean the shower, but overall, it was super cheap (the only paint I had to buy was an $11 quart of wall paint). I did buy a new shower curtain and rod and rug, but overall, not too bad!!

Wednesday, June 13, 2012

Whoops

I realize I never put up a picture of our half-finished laundry room, so here goes:

Before: 
 After: We obviously still need to trim out a lot of things like the window and add a panel door to the electrical panel and drain cleanout. We also need to to figure out what to do with that dryer vent. It's one of those things you don't think about until it's too late. And we might add a ceiling. We painted the floor white which I love, but yet messy. The left side is storage under the staircase which isn't finished. I plan on putting a curtain up so it will be easy to access it. I also want to put some white cabinets or shelving above the washer and dryer. We actually learned a lot and are quite surprised by our work, especially the drywall.

Slow but steady

We just finished putting up our cabinet doors for the old cabinets. We cleaned, sanded, primed and painted them during Memorial Day weekend and a few days during the week. I think they look  really good! The wall color, however, is continuing to bug me. It's too light and too blue for the new cabinets, but I think once we get the backsplash in, it might not be as noticeable.

Some quick pictures:

First, let's go back to our apt in Tower Grove...we've really stepped it up. When I look at this, I realize you really can feel comfortable in any place as long as your stuff is in there. It's definitely not pretty, but it worked for a bit. We called it our "kitchen bedroom" because we actually had a real bedroom (kind off) but we had an extra bed and the mattress wouldn't fit down the basement staircase! So, it stayed here for 1.5 years.
 Here's our current kitchen when we first moved in and before we painted. Notice the wrought iron rails.
 We took the rails down to make moving in easier and never put them back up. We were pretty sure we could manage to not fall down the stairs. We painted it a light green color. I originally picked out a darker green, but I got scared and went lighter. Wish I would have stayed with the other :/
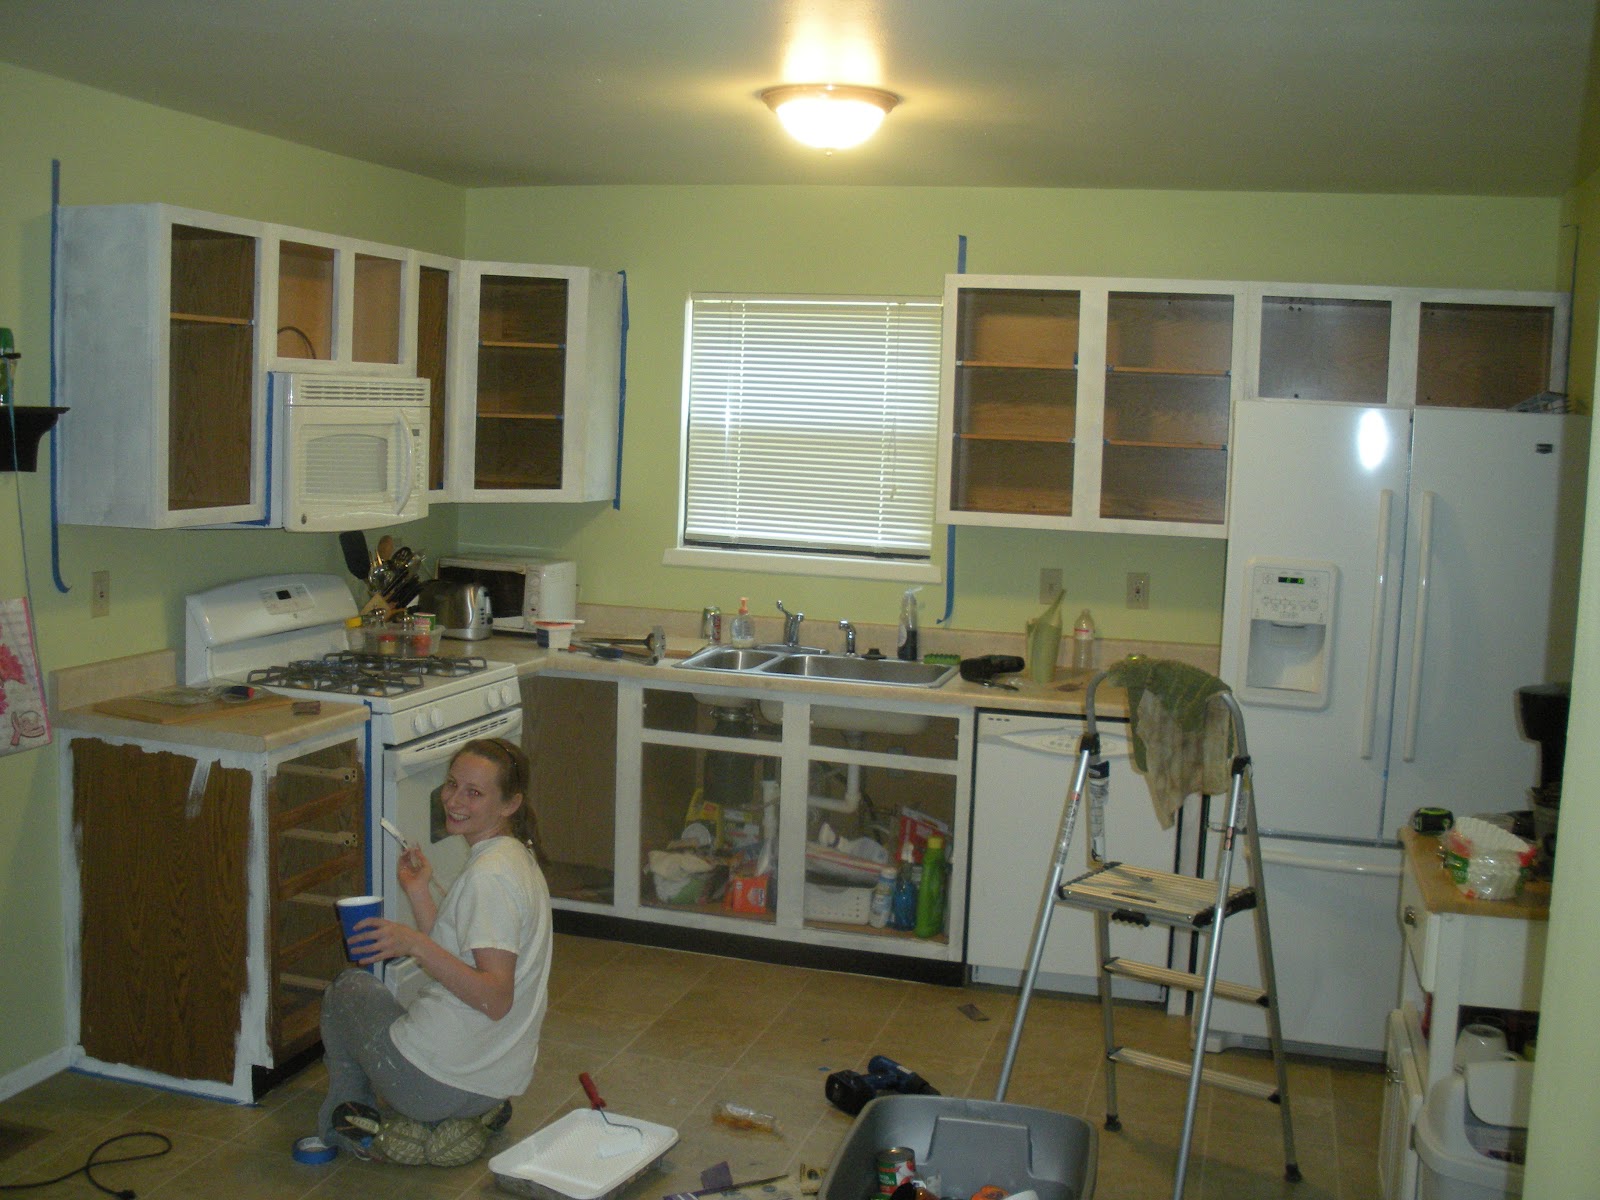
 Here's what our kitchen normally looks like--messy and with all our cereal boxes on top of the cabinets because we don't have a pantry.

 Priming! I loved coming in from a trip to Lowe's or HD and seeing how much brighter it was! I was sad to have to paint the cabinets a different color other than white. I love white cabinets. But, we weren't sure if they would look ok with the stark white appliances.

 Best transformation was adding a little molding to the top and bottom of the wall cabinets. Cody wanted to leave the crown molding white...I said no within 1 millisecond. I KNEW he was going to say he wanted to paint the crown molding a different color...haha!
 Next, we ordered and installed a new lazy susan...or Lazy Daisy as ours is. Our old one was cracked and would get caught up in the turnaround. It wouldn't swing all the way around. These things aren't cheap either! But it was worth the 3 hours it took to install and the effortless way I can spin it! The first time I used it, I forgot it was the new one and pushed it hard because that's what I used to have to do and it spun so nice. Love it! Of course, we have to keep any box we get for a few days because the cats love to play in them. Can you find both of them??!!

One night, Cody made me this awesome dinner--it was chicken bites and fried hash browns. He grated red potatoes and just put them in the skillet...I caught a stomach virus at work and vomited it up at 1:30 that morning. I aspirated a piece of potato as well...and that came up with a cough a few minutes later. Looking at this makes me cringe.

Anyways...here's a picture with the crown molding painted. I really wish Cody would let me push our fridge all the way back. He's scared it will hit the wall to the right. I say "oh well".

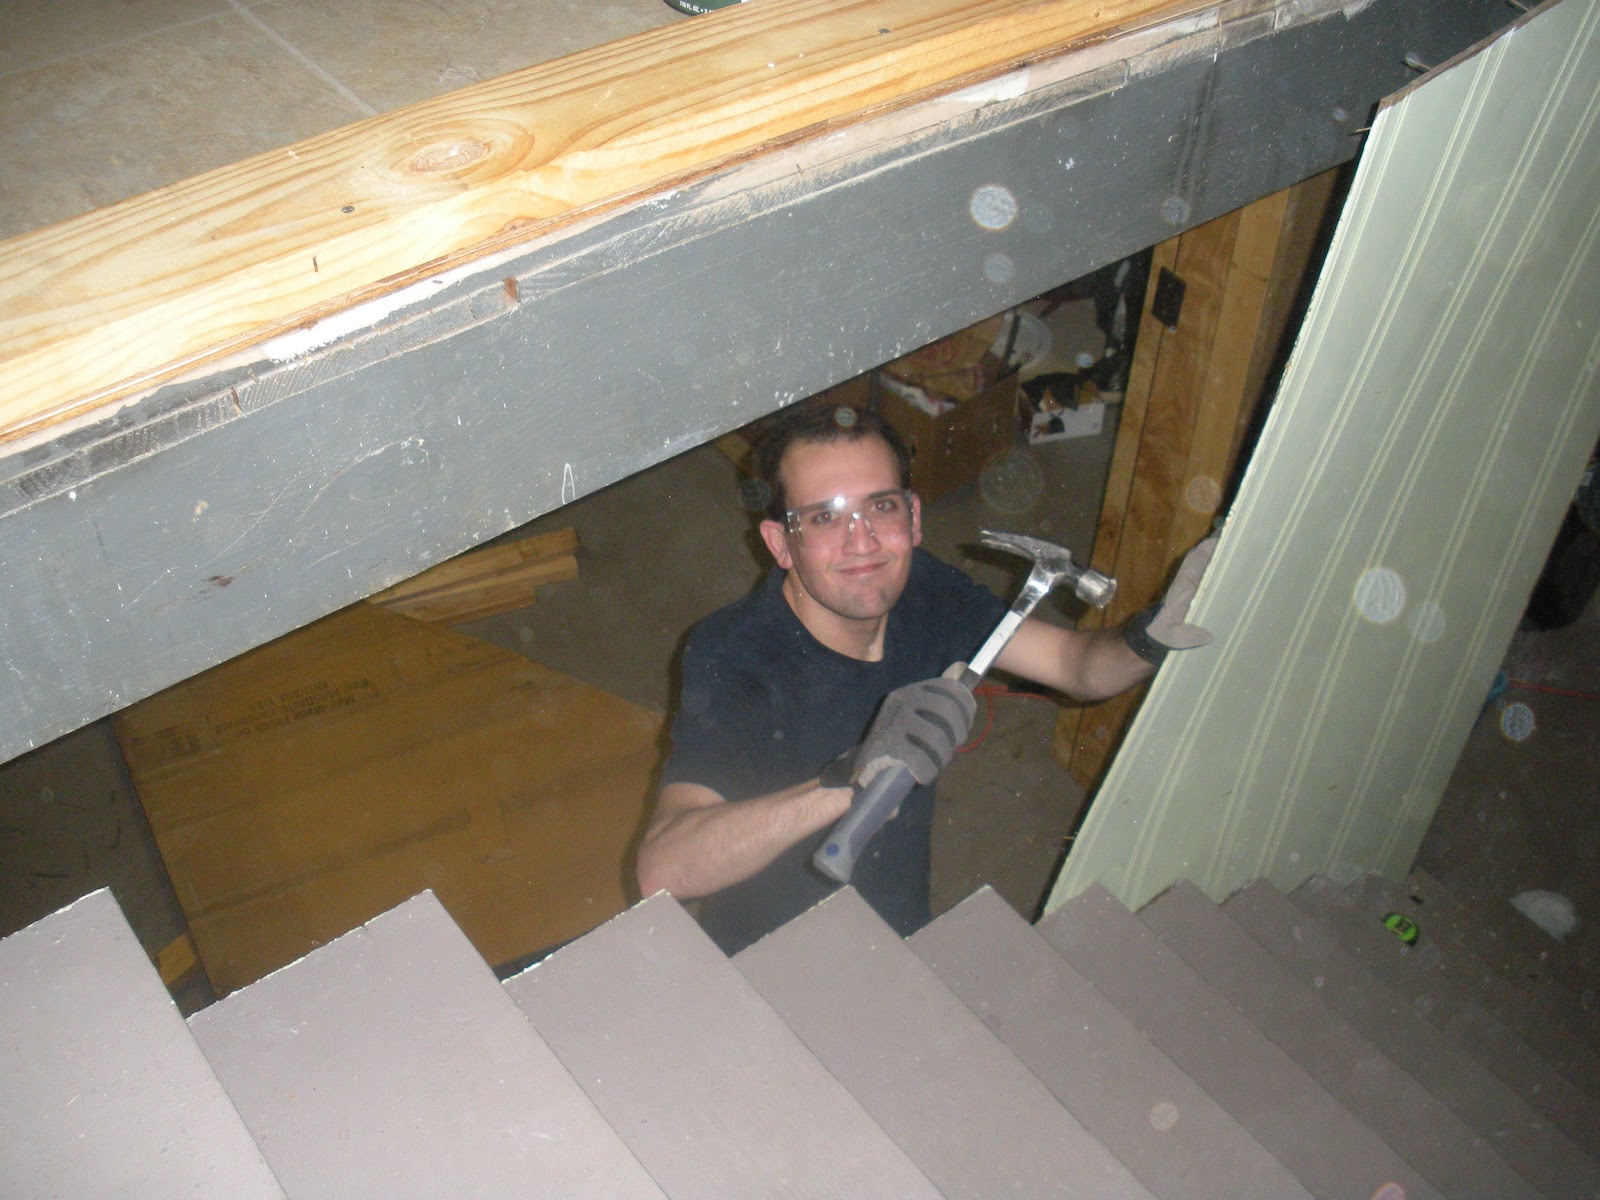
This weekend we finally started to build our half wall. I found out Cody is only going to be building one of the half walls for now...grr!!! I have no idea why he thinks that's a good idea, but I'm just rolling with it. We do need to get it finished so we can install our new cabinets and then the countertops and backsplash. The wall framing didn't take too long, and it actually looks good and barely wiggles because he bolted it through the basement floor joists. We still have to go into the attic and nail it from the top on the side that will have the pantry. 

 Nice form.


We ordered a 24" pantry cabinet (so excited!!!), a 33" double door base, and an 18" base cabinet that we will make into a trash cabinet. They are ready to assemble cabinets...nothing fancy or anything because we figured we would have to sand and repaint them anyways. But, the pantry door came broken :( So now Cody has to get it refunded and get a new one sent.
 Cupcake does well on her leash.She cries every night at the door until I take her out :)
 Ugh...How do you rotate these pictures?! This one's staying like this. Here it is with the cabinet fronts and new hinges. The door that is missing is the one that we had to take a piece of stained glass out of. We plan on putting a wood panel back in the door and painting it with magnetic chalkboard paint...will it look ok? probably not. Worse comes to worse we have to buy a new door. Oh well. I can't wait to have my trash can hidden!!

 Doesn't the crown molding make the cabinets look nicer? I think so!

We still need to:
1. finish wall--drywall, paint, add trim. Once we drywall, we can finally finish our laundry room!! (which is directly below the kitchen)
2. sand, prime, paint new cabinets and then install them
3. new counters, sink, faucet
4. backsplash
5. trim around window
6. add shelves to the left of the window
7. install our under cabinet lighting we got from ikea
8. ?? probably a lot of other things (new light). This list just made me sad.

Thursday, May 24, 2012

I'm baacccck

It's been awhile! I stopped posting because I was so stressed out about finding a job that I eventually just became really lazy and depressed. But, now that I have a job and will have some money (!) soon, we can start doing projects around the house! Since we finished only half of the laundry room, we are thinking about starting that project back up this summer. We found some pretty cheap but decent cabinets online that will match our current cabinets. We plan to attempt the sanding/priming/painting process this weekend to see if we even like our current cabinets after we do it. If we do, we will only have to spend around $600 to get our new pantry cabinet and two base cabinets for the half wall. If we don't like it, then I guess we will just get all new cabinets :) Not that I really want to do that, but it would be fun!

We also just ordered a small patio set on Target which was 50% off. It's not fancy, but it is at least a table and 4 chairs! I just can't bear spending so much money on a patio set when we can't sit out there very long because of the heat and mosquitoes. I will post some pictures as soon as Cody gets home and puts it together!!

Just wanted to say hi! Glad I'm back. Let's take bets on how long this will last...Anyone?

Tuesday, March 6, 2012

More basement and other random stuff

Our house is a complete mess. We went from having a "kitchen bedroom" in our old apartment to having a "kitchen living room" today. Yes, we got our new sectional (!) today and our original plans were to put our old couches in the basement. Unfortunately, we started this basement reno project and all our crap from the laundry room is in the way. So we will be having a kitchen living room for awhile. Yay!

Our sectional is absolutely fabulous!! It fits great. It's big enough to fill this awkward long living room but doesn't obstruct the walking paths. It's also a light color, which scares me, but I'm glad we went with it rather than the darker grey colors we thought we were going to get. Our house is pretty dark so the white helps to brighten it up a little. We definitely need to get some new pillows and art on the wall! Here are our babies already claiming their spots. This sectional is huge--Cody and I can both lay down and there's still two cushions left for the cats! I'm not so sure about the rug in this room now, either, but good thing it was cheap. I may put it down in the basement when we finish the rest of it.


Butter still prefers to lay on the plaid couch on his pink cupcake blankey: (no, that's not a carton of real eggs--they are chocolate covered marshmallow eggs)


Meanwhile, the basement has been making slow progress. We had to hook up our sink and washer and dryer so we could do laundry tonight--Cody ran out of underwear--I think he should just buy more so that we can go more than 10 days without clean laundry! We went home this weekend for a wedding, so we couldn't get as much done as we wanted. We took Friday and Saturday off and Sunday we finished the drain pipe for the laundry sink. It was freaking scary cutting off the main drain pipe from the kitchen above, but we did it!! So far, after 3 loads of laundry and running the dishwasher, it hasn't leaked or busted out sewer gas--I feel more hopeful now.
 Last night, we built a little stand for the machines to get a little more level since the floor slopes so much for the drainage purposes. It's pretty cool, and puts the washer and dryer up a couple of inches which is actually pretty nice and doesn't hurt my back as much. However, the washer shakes a lot and therefore it shakes the whole stand and we might have to destroy it. We'll see.

We also tried to hook up the sink last night, but we were missing something, so that means another fun run to Lowe's today. Here's Butter doing what he does best--being curious.
 Tonight, we got it all temporarily hooked up and did three loads of laundry. We wanted to drain our washer to the laundry hook up thing on the wall, but there's something about the pipe size being smaller than we need  and didn't want it to back up, so we just decided to not press our luck as much since we don't really know what we are doing and just keep it draining to the sink. We really should have some type of venting pipe in this system, so we'll see how it goes. 
 I'm tired of writing now so here's just a few more pictures of our house lately:

 I might have freaked out when the delivery guys kept bringing in bags and bags of cushions. I thought for sure the sectional was going to be too big!!

  Our gorgeous dining room view from the kitchen.

 Cupcake and Butter both learned how to actually lap up the water from the faucet. They are both obsessed with running water now.  She's quite proud.

In other news, I'm trying to figure out some history of our house. I'm really thinking it was a prefab panelized Gunnison home because of the way the walls in Cody's office are:

 Cody painted this room--don't blame me for the bad trim work (sorry, Cody)! It looks better in person.
I don't know why I am so excited about having a prefab home, but I kind of am. Ours has been drywalled over in most rooms. The office is the only original walls left other than in the closets. Apparently Gunnison homes were sold to U.S Steel in 1953, the year before our house was built, and we just so happen to have a US steel beam in our basement! I'm looking for the plaque that they put in the utility rooms in the old homes, but ours has a basement, and I am scared of our utility room so maybe I'll look during the day tomorrow. I'll let you know! I'm also trying to find the original floor plan of the home (why, I don't know because I know what it is) but there's not much info I can find on the Gunnison homes online. Search for me!!

Tuesday, February 28, 2012

Steroid Worm

You can't see it very well in this picture, but this worm MUST have a growth hormone problem--He was freaking huge!! I mean like 1 cm wide and 7 inches long!!! We have two tree stumps in the back yard, one we finally dug up since it was rotten and the other we couldn't get up yet. There is a bunch of sedum planted around them so I transplanted the sedum plants to around the deck and found this guy.


 Also, note that weird piece of fabric in the middle upper right hand corner--just another sign of how trashy this place must have been!

Basement Laundry Room Progress

Oh where to begin? This was kind of a whirlwind project for us. When we moved in, we always said we could finish the basement since it had all the 80s paneling in it, looked dry and it wasn't very scary to go into. I didn't think it was something we were actually going to do--and do this soon.

It all started one night when Cody was trying to cheer me up and give me a project, so we demo'ed this awkward closet in the laundry room. And by we demoing, I mean Cody demoing and I watched and took the nails out of boards. I thought we were going to stop there--it already made a big improvement in the space. Then I think Cody got real into it. And that is how we got to starting this project.We forgot to do the before picture, and I will warn you---These pictures don't show anything very well. 1. I have a bad camera and 2. the room is only about 12x11 so it's not great for showing more than one wall at a time. It could be frustrating.

Here is the closet we demo'ed--we put all of our paint in it before. It's on the wall with the staircase, so it made for a very dark space under the stairs and I never actually used that under stair area for storage. I will now though--so excited!!


Here is the space after the closet is out--we found lots of stuff under there, including a can of tomatoes from the government! I couldn't tell how old it was--probably from the previous owners so anywhere from 1986 until 2011. I have a feeling this place was quite the site when the flipper guy bought it last February. I especially get this feeling when I find fake flower leaves in the yard and I actually dug up a straw. I mean really, who finds a freaking straw in their yard? An a ball of aluminum foil. 

Here is a shot of the room as you come in through the door--the back wall is where all the electrical and plumbing is so it's going to stay this layout. I'll be up front--this is not going to be a fancy room, just going to look a lot better and it is basically our dry walling practice for our kitchen project. Although I just asked Cody if we are going to break open the dry wall to put in the electrical boxes that we want to run through our future half-wall he just said "maybe"...hmm...Oh well, Cody must like this project. Oh, the kitchen is right above this room so that's why I asked. On another note, we are leaving the ceiling unfinished for now; at most we will put in a drop ceiling since we have a lot of junction boxes and plumbing and gas lines in this room.We don't know what we are going to do with the dryer vent--it was one of those things you think of later in the process. Again, practice makes perfect! Also, I'm a kitty litter pail hoarder. The clumping litter only comes in these stupid plastic bins and I hate throwing/recycling them. They seem so useful. For example, we may use them to mix up the drywall mud stuff! So so so many options--I have like 5 of them already (one of which is noted in the squirrel post!)


 I plan to put a small wall cabinet above the washer and dryer. We have to build a box for the dryer and stuff to sit on as well since the floor drains to the drain in the middle of the room, meaning the feet on the machines aren't expandable enough to accommodate for the floor slope. We wanted to build a cement box at first, but since our cement floor is painted, we figured it wouldn't hold up very well and the wet cement would poor out the bottom of our mold. Now we are going to just build something--we don't really know what yet.

Here is the room with the paneling taken down and the wall on the right of the doorway is gone. I wanted to make the laundry room smaller and the first room bigger, but the support beam just seams like a good place to put a wall, so we are leaving the layout as is. Unfortunately, people put all the utilities right smack dead in the middle of the basement so this makes for 3 small rooms with a weird hallway. Oh well!

 After we cleaned all that mess up, we thought we were finished, but nope, demo-ing is addictive!! Here's the before:
 During (that board in the top is where we have to add a half-way in the kitchen)
 During again (It's so weird to see what little you stand on in the floor above!)
 And after!! The other side needs to be torn down as well since we need to dry wall it so the entry from the back door looks okay. We also need to put new stair treads and risers on to really dress it up. This stair well is the first thing you see every time you come in the back door.

So far, it hasn't been too bad. This weekend was the first real weekend of DIY-ing. On Friday, we took the washer, dryer, and sink out and completely gutted the space--minus the wall in between the first room and laundry because there are some sketchy wires that Cody is "avoiding".

Cody is actually very handy. I am impressed with his skills. We are a little unsure about how to vent the drain from the sink, but we will look into that. So far, Cody has soldered the hot and cold pipes for the laundry shut so we could move them, taken apart some electrical boxes so we can frame around them and he finished the framing last night. Well, framing around the back and window wall. We still have the rest of the room to do, but we wanted to do these two walls first so we could hook our washer back up and do laundry soon. We took about 5 trips to Lowe's and 3 trips to Home Depot on Saturday. On Sunday, we decided to spend the money on an air compressor and nail gun because framing with Cody's trusty ol' blue drill was not going fast at all. We have bought so many cool tools--Cody said what we save in labor we are gaining in tools! I think we are going to have to build a special storage for all our shit tools. I have soooo many projects lined up for our nail gun though--including crown molding in the living room, new carport roof, bead board in the dining room or bathroom, etc etc etc. We also bought a hole saw today which I immediately thought to myself "ooh I can build birdhouses now!" The possibilities are ENDLESS!!!! haha. Ok, I think I am done with this post right now. Cody has finished most of the framing and he is working on plumbing  the sink, I will post more pictures soon. Tonight was supply getting and "reading" night.

P.S.-sorry for the awkward page layout. I started messing with it and then stopped, but I don't feel like  messing with it anymore so it's staying for awhile. I have so many projects I can't remember them all!!!

Tuesday, January 24, 2012

I wish I wish I wish

Here's what our house looks like now--dark and dirty because of the dark trim and dark everything:
 Here is is after photoshop (note: I don't have mad photoshopping skills yet so don't laugh). I must say the knock out roses add the most, but the trim is white and the door and shutters are happier colors. I like it. I also didn't add landscaping to the left because I didn't know what would go there.
And here it is with a cute little front porch and white rail that we could do. Sorry about the blue siding, not my favorite but it's hard to pick a good color. Still looks a million times better. I really like the porch!

hmm...what else can I photoshop...I think I'm going to do the back deck next!!!